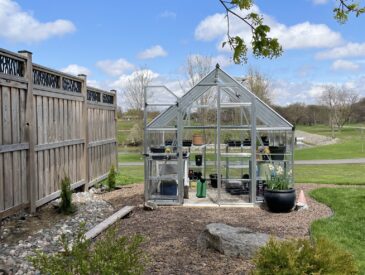
Building a polycarbonate backyard greenhouse kit is a project that any DIYer can accomplish. Kits sold on the market today are very user-friendly and come with all of the components and hardware you need. You just supply the manpower and a few basic tools to put things together. In 2022, we put ourselves to the test by building our own Palram-Canopia Balance 8x8ft polycarbonate backyard greenhouse kit. We learned a lot along the way. Here, we share our 8 best tips for building a polycarbonate backyard greenhouse kit.
How to select a site for a backyard greenhouse
Start by laying out the pieces and reading through the instructions
Our Palram-Canopia Balance 8x8ft backyard greenhouse kit came with more than 650 parts. Some of these were spare pieces of hardware, but the vast majority of the components were required for the build. Before you begin construction, unpack your greenhouse kit, lay out the pieces in sequence, and ensure that you have everything you need.
Then, read all the way through the instructions, so that you have a macro-level view of what the build will entail. If you can build IKEA furniture, you can assemble a polycarbonate greenhouse kit! But, it does take some getting used to interpreting what all of the diagrams mean. Get a gist of how to read them before you dive in. It’s easier to do this now than it is to figure them out while the pressure is on – for example, while you’re trying to support an entire wall on your shoulder because you’re not sure what comes next.
Have the appropriate time, tools, and manpower available
Building a polycarbonate backyard greenhouse kit is a two-day job for two people. You really can’t build this structure as a single person, as there are too many times when components need to be held in place with both hands while being fastened together with nuts/bolts or other hardware. And, it’s too long of a job to complete in a single day. Dedicate an entire weekend to the project, and make sure you have a helper.
This is also a good time to collect all the tools and supplies you’ll need for your build. In addition to the kit, you might want to have the following:
- work gloves
- a level
- a drill
- a Philips head screwdriver
- a wrench
- scissors
- a tape measure
- a ladder
- silicon spray
- a rubber mallet
Build on a calm day
The lightweight panels of a polycarbonate greenhouse can act like sails when strong winds blow. They need to be precisely fitted into the narrow channels of the greenhouse frame and will be very difficult to wrangle into place if you are building on a windy day.
Furthermore, your greenhouse structure won’t be stable until it’s fully assembled. You will start by building the rectangular side and end walls, and will raise them into place. Then, you’ll add the peaks to the front and back walls. These will be connected by the roof ridge beam. It isn’t until you reach this point that the walls will support each other and the structure will begin to feel secure. (Bonus tip – if you are spreading your build out over a couple of days – this is a good time to call it quits on Day 1.)
However, while the greenhouse frame is built at this point, it won’t be fastened down to your foundation until you’ve completed construction at the end of Day 2. That makes it especially susceptible to any strong wind gusts. Check the forecast before you build to ensure you can complete your work before bad weather rolls in.
Don’t build on a hot day
While we’re on the topic of weather, it’s also a good idea to avoid choosing to build your greenhouse when it’s hot and sunny outside. This is because you’ll be completing much of the build from inside the structure. The temperature inside a greenhouse on a sunny day can reach 30 degrees Farenheit/15 degrees Celsius higher than the ambient temperature. Unless you are building your backyard greenhouse at a very cold time of year, it’s unlikely that you’ll want to be completing manual labour in those types of conditions. Pick a cool and/or cloudy day if possible.
Run a piece of conduit under your foundation before you start to build
Even if you aren’t planning to run power or water to your greenhouse – or maybe, especially if you aren’t planning to run power or water to your greenhouse – run a piece of conduit under your foundation before you start to build. Having that access into your greenhouse will allow you to drop a heavy-duty outdoor extension cord through the foundation. Then you’ll be able to plug in grow lights, exhaust fans, even a speaker system or a phone charger or an electric tea kettle – small conveniences that will make spending time in your greenhouse more enjoyable. Your future self will thank you that you thought of this.

Wait until the end to tighten your hardware
You’ll be tempted to sink every screw and tighten every bolt as you go along. Don’t do it. A polycarbonate backyard greenhouse kit is built around a strong but flexible and lightweight aluminum frame. It is very easy for things to go ‘off-square’ in the process of building. Often, you won’t realize that you’ve lost your square until you try fitting the last piece in place, and can’t do it. Keep some slack in your hardware until all of your components are in place, and then make a second pass to tighten them up.
Caulk your roof panels into place
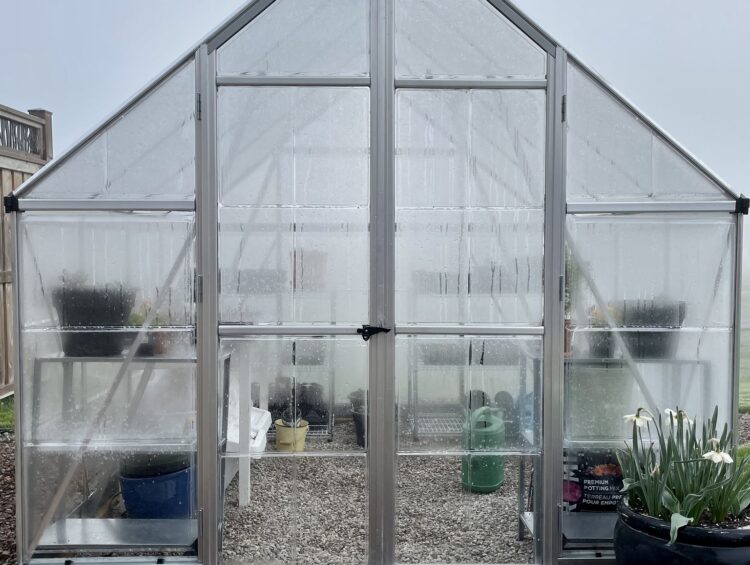
This goes back to the point about polycarbonate backyard greenhouse kits needing some reinforcement to hold up to high winds. The most common complaint polycarbonate greenhouse owners have about durability has to do with panels coming loose and blowing away. Running a small bead of clear silicone caulk along the joints where your panels meet the aluminum frame will help to lock them into place. As a bonus, it will help to keep your greenhouse more airtight and watertight – good if you are planning to heat the greenhouse, and/or use it on rainy days. It will also help to stop the panels from rattling in the frame and reduce the amount of noise your greenhouse makes on windy days. We caulked our roof panels (which seem to be the worst culprit for blowing away) but didn’t caulk our wall panels. So far, so good.
Keep the spare hardware and assembly instructions
You will have some leftover hardware – assorted nuts, bolts, and screws. Keep them. Also keep the assembly instructions that came with your greenhouse – either a hard copy or a version you can download from your manufacturer’s website. You never know when you might need them.
In our case, we needed them about six months after we first built our greenhouse. That winter, we lived through the 2022 Christmas Blizzard, also known as Winter Storm Elliott. Our greenhouse lived to tell the tale, but a few months later, our roof vent came loose. We found that the metal frame for that panel had sheared right through one corner – no doubt the result of the sustained winds it endured during that storm.
Canada Greenhouse Kits were quick to ship us a replacement piece, free of charge. We wouldn’t have known which part number to request without having those instructions handy. While some greenhouse components have their part number etched into the metal, there are others that ship with the part number identified on a sticker. Those stickers fade and wear off with time. The instructions will always help you to identify the part number of any component in question.
So there you have it… our best tips for building a polycarbonate backyard greenhouse kit. Have you built a greenhouse of your own? Do you have any tips to share? Drop a comment below to let us know.
[…] With the foundation complete, we were ready to assemble our Palram-Canopia Balance 8 ft polycarbonate backyard greenhouse kit! In our next post, we will share the tips and tricks we learned from our build. […]
[…] 8 best tips for building a polycarbonate backyard greenhouse kit […]