How do you build a foundation for a polycarbonate backyard greenhouse kit?
In our last post, we described the thought process that led us to select a polycarbonate backyard greenhouse kit for our property. We knew we wanted to add a greenhouse to our property, and we considered the pros and cons of hoop houses, DIY recycled window greenhouses, and polycarbonate kits before finally deciding on the latter. In this post, we’ll describe the foundation we chose for our greenhouse, the alternatives we selected it from, and how we built it.
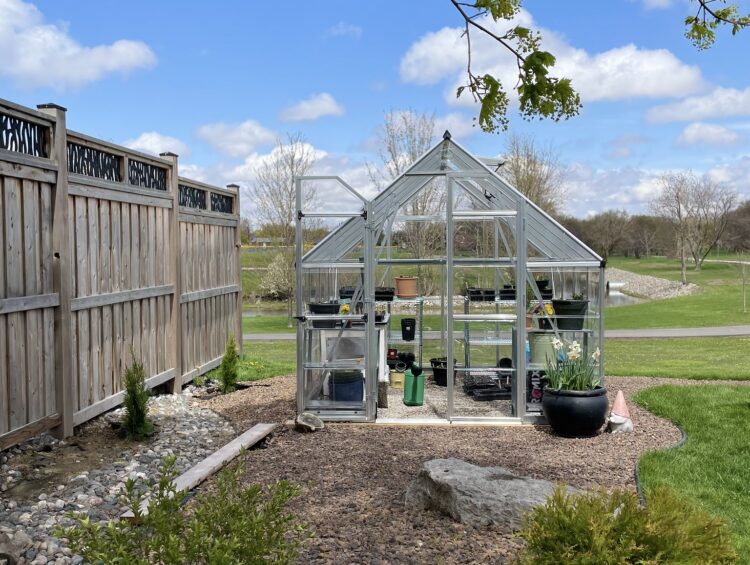
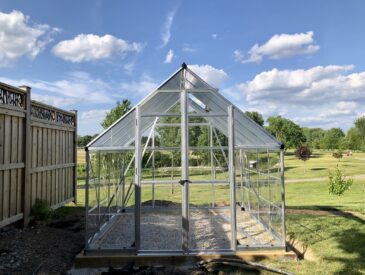
The Palram-Canopia Balance 8×8 ft polycarbonate greenhouse kit
As a reminder (if you read our last post) or as background (if you are new to our blog), our greenhouse is a Palram-Canopia Balance 8×8 ft polycarbonate backyard greenhouse kit. You can find this kit for sale in the USA here and in Canada here.
Requirements for a polycarbonate greenhouse foundation
No matter which type of foundation you choose for a polycarbonate backyard greenhouse, it must satisfy the following criteria:
- It must be able to keep the greenhouse anchored. Polycarbonate is extremely lightweight, and because of this, backyard greenhouses built from polycarbonate have a very low weight to surface area ratio. This means they are extremely susceptible to collapse during high winds. The foundation should therefore be heavy enough to weigh the entire structure down. The greenhouse structure must also attach securely to the foundation.
- The foundation should be designed to prevent the growth of weeds inside the structure. A bare earth floor, for example, will easily sprout weeds, and isn’t a good choice unless you have a plan in place for weed suppression.
- It must allow water to drain away freely. Stagnant water inside a greenhouse will promote the growth of algae and attract insects. It may also create problems with humidity that can then allow plant disease to take hold. Greenhouse flooring should be permeable, or if it is not (such as with a concrete pad), it should have a drain installed.
- An additional consideration is how the foundation will affect the temperature inside the greenhouse. Brick, stone, and concrete have a high thermal mass. This means they can absorb heat during periods of warmth (i.e. during the day), and will release that heat back into the environment during cooler periods (i.e. overnight). Clever use of thermal mass can help to keep a greenhouse a few degrees warmer than it would be without which is an especially important consideration if you are building a cold frame or unheated greenhouse.
Selecting a foundation for a polycarbonate backyard greenhouse kit
There were 5 types of foundations we considered building for our greenhouse:
Concrete pad
We dismissed this idea pretty quickly due to the expense and permanence, and the fact that a concrete pad is impermeable (meaning drainage would need to be built in, and any spills, such as potting soil or leaf detritus, would need to be managed). For us, it just felt like there were lower-maintenance options available.
Concrete footing
We did have someone come out to quote us on pouring a concrete footing. The plan would have been to excavate and pour the footing but leave the interior mostly intact and filled with pea gravel. Again, we decided we weren’t in love with the permanence of this idea. It also felt like a bit of overkill, because a polycarbonate greenhouse doesn’t need that substantial of a foundation. Finally, we had difficulty keeping the contractor engaged – it was a small job for them, and not a priority. Wanting to avoid any further delays with the project, we moved on to another option.
Paving stone footing
Many types of interlocking paving stones are on the market, meant to build retaining walls or garden edging. These can be used to build a greenhouse foundation, too. It’s similar to installing a concrete footing, but a bit easier for a DIYer to achieve. It does require a substantial amount of time and effort to clear a site and prepare for paving stones, however. They require a base of crushed rock and limestone screening for proper drainage. This also prevents frost heave in a cold climate like ours. The amount of finicky work required, plus the potential for heave to occur anyway, led us away from installing a paving stone footing.
Wooden deck
Many people choose to install a wooden deck to support their greenhouse. While they’re a bit more permeable than concrete pads, wooden decks still need to have spills cleaned up quickly to avoid problems with algae and mold. In our climate, the wooden deck would need to be installed below the frost line in order to prevent shifting. This would require the installation of posts secured in concrete. Given the complexities of the job, we decided on another option instead.
Wooden frame
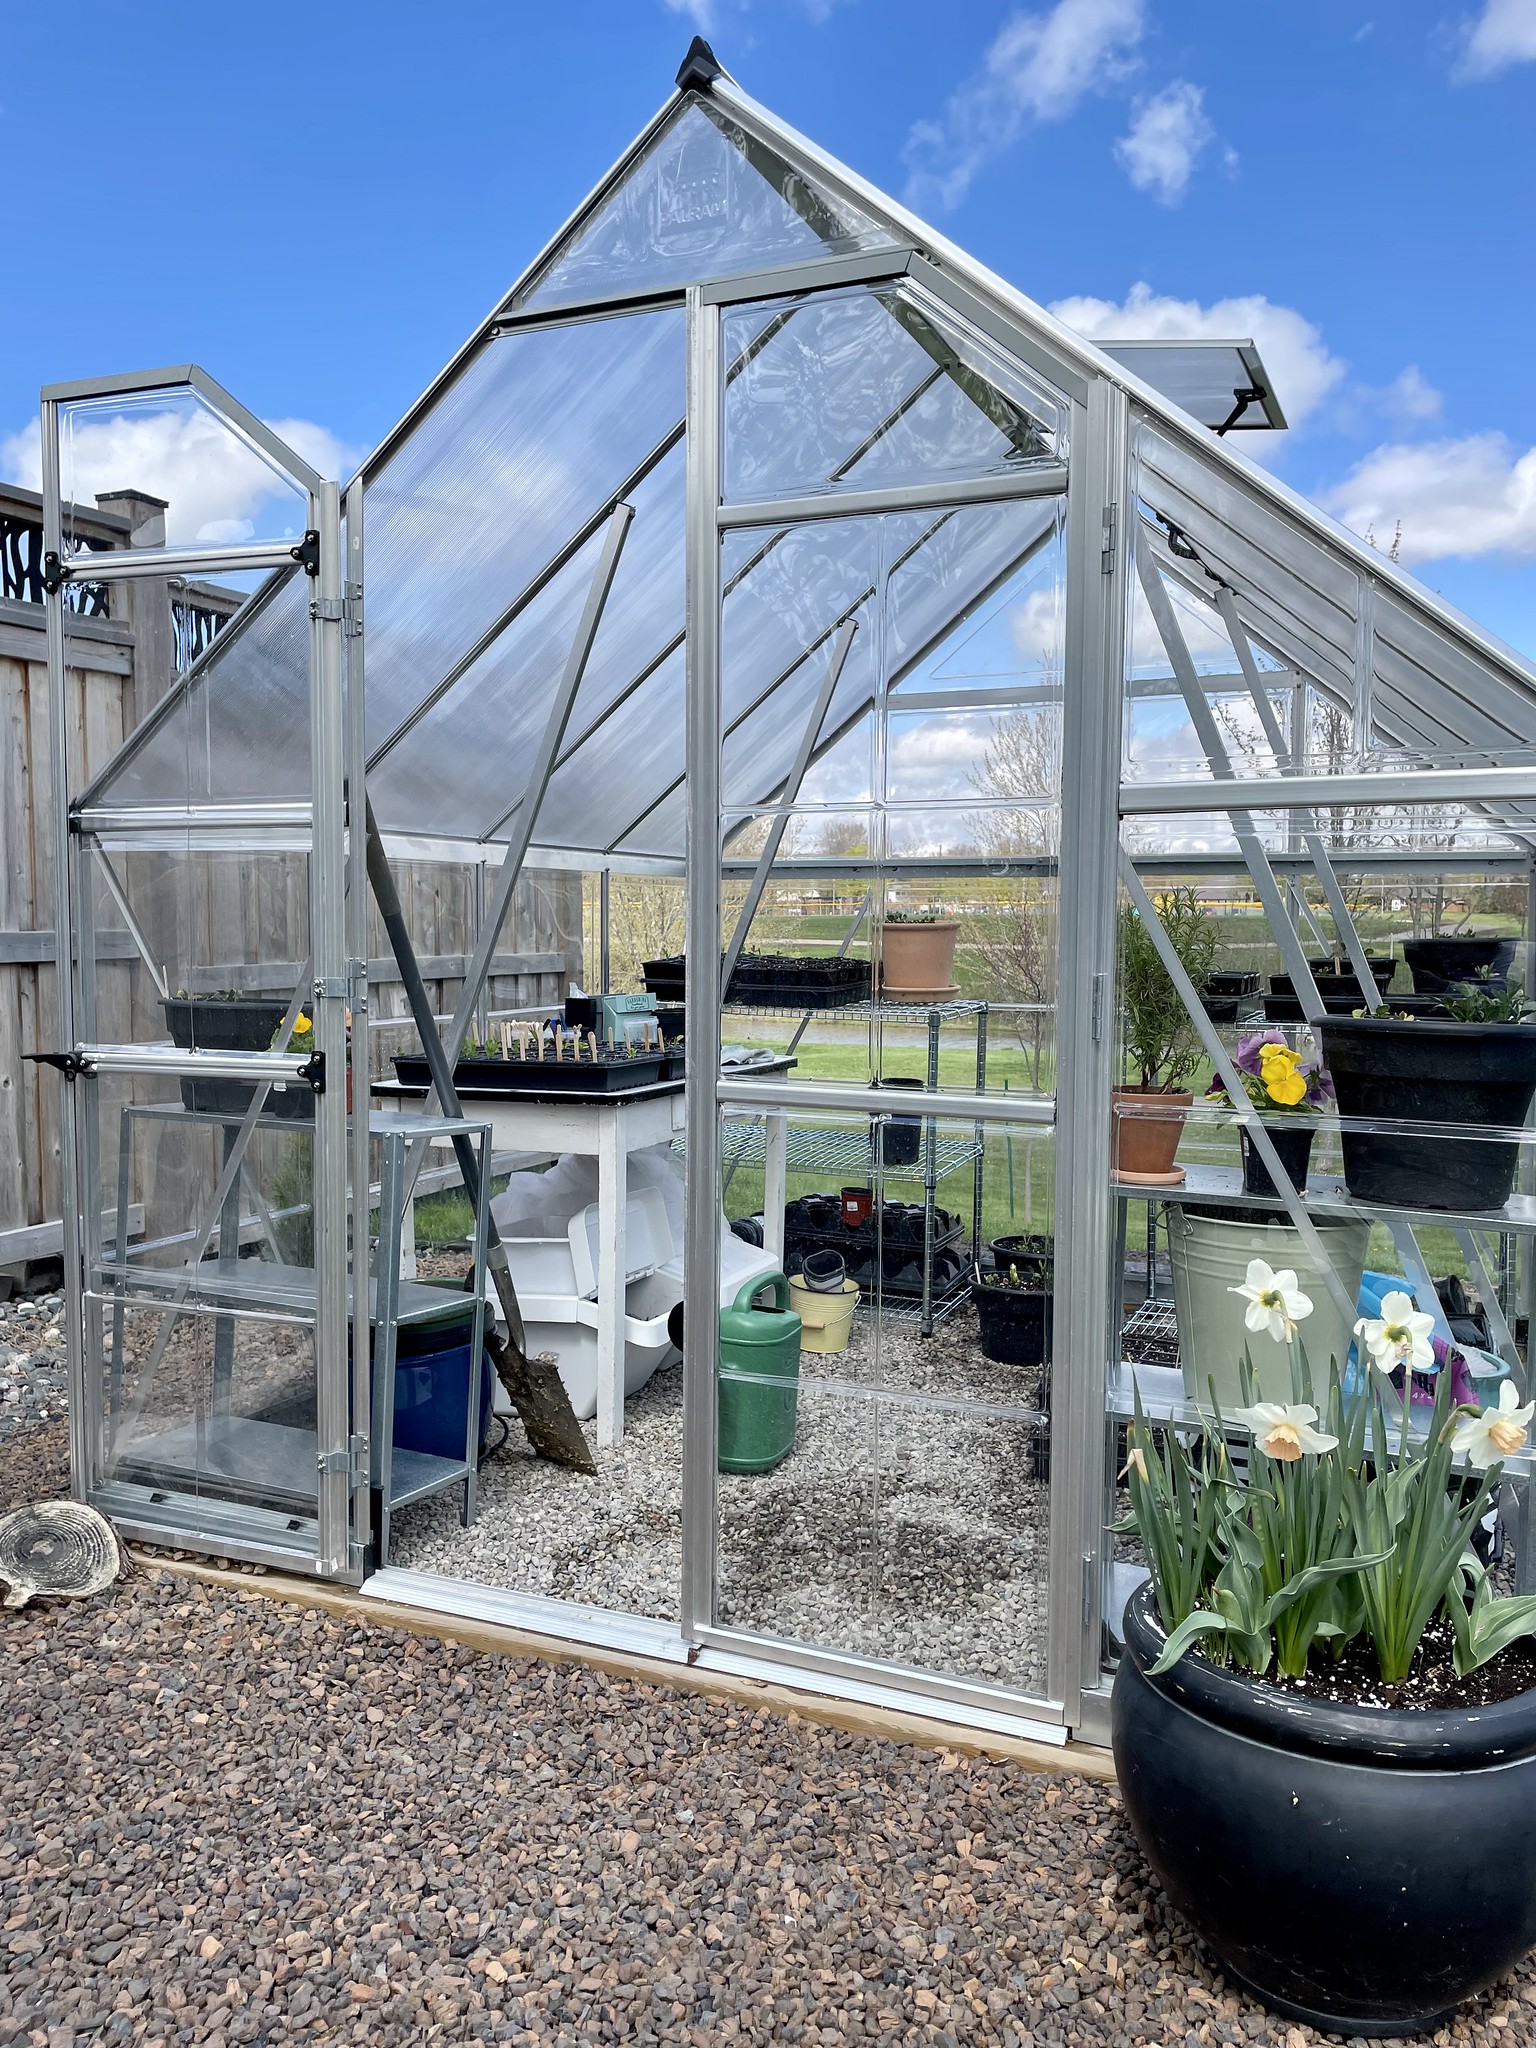
We ultimately decided to build our greenhouse foundation from a frame of pressure-treated 6x6s. The interior floor of the greenhouse would be pea gravel. This allows water to drain and doesn’t require clean-up when soil is spilled. This solution felt like it gave the correct amount of durability while being both cost-effective and DIYable.
Building a wood frame foundation for a polycarbonate backyard greenhouse kit
We built our greenhouse foundation frame from pressure-treated 6x6x8 posts. It’s important to choose either a rot-resistant wood (such as cedar or redwood) or pressure-treated wood to ensure the foundation holds up to moisture over time. The current price for a single 6x6x8 is about $42 CAD and we required 4 of them.
We assembled the foundation on our concrete patio to ensure it was level. To attach the posts, we used L-shaped brackets on the inside corners, and flat junction plate hardware on the exterior seams. The posts were laid out with the end of one post overlapping the start of the next. The outside dimensions of the whole frame measured 8 feet, 5.5 inches. (Keep in mind that nominal 6×6 posts are actually 5.5×5.5″.) This meant that the greenhouse itself would be secured to the middle of the foundation posts with a few inches of wiggle room on each side.
Once the frame was built, we double-checked its diagonal dimensions with a tape measure. They were equal, meaning it was square.
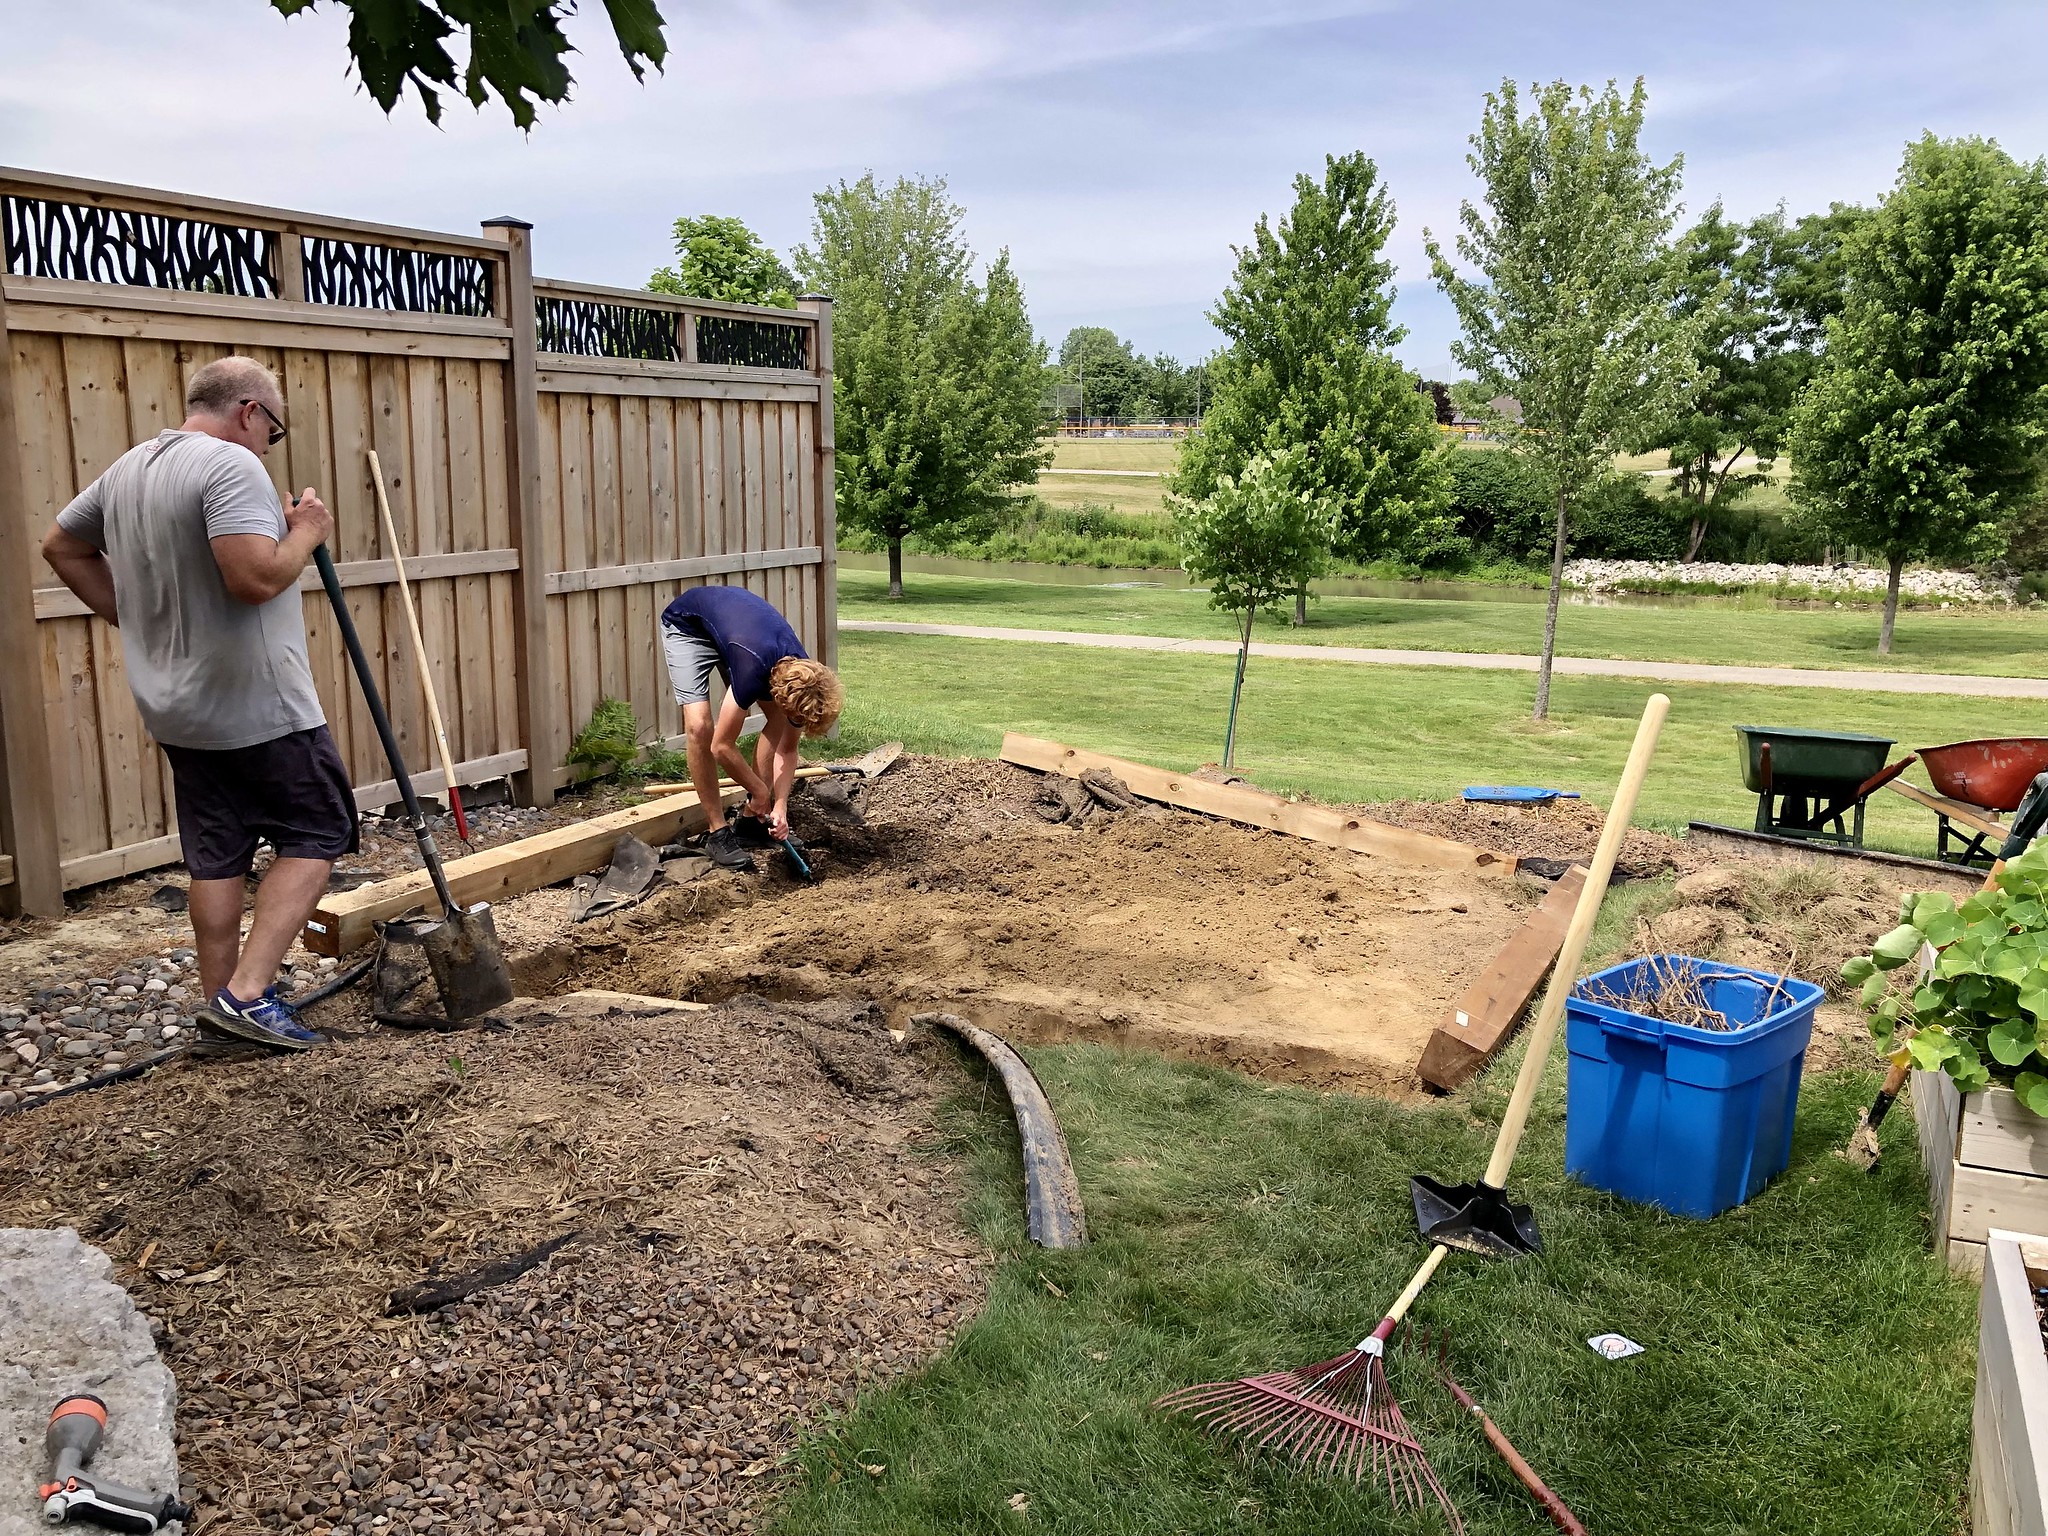
Site preparation
In addition to building the foundation, we also had to ensure the site was prepared to receive it. The area where we built our greenhouse slopes about 6″ down from the front wall to the back. Because of that, we had to dig the foundation deeper along the front wall and along the sides. It sloped up to be shallower at the back. The foundation we dug was a channel approximately 8 to 10 inches wide.
We tamped down the earth. Then we added several inches of crushed gravel and another few inches of limestone screenings on top of that. These give the foundation posts support and help moisture to drain away from the wood. We tamped it all down and ensured that each side of the foundation was level. We dug the foundation deep enough that with the addition of the crushed rock and limestone screenings, the top edge of the wood posts sat just above ground level.
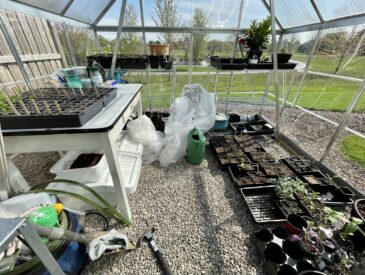
In the front corner of the foundation, we removed some of the crushed rock and laid a piece of 90-degree elbow conduit. This piece of conduit later allowed us to run a heavy-duty outdoor extension cord from an exterior outlet at the side of our house. It runs along the landscape edging that borders our yard, under the greenhouse foundation, and up onto the greenhouse floor. We now have a power supply inside the greenhouse and can use it to run fans, charge our phones, etc.
Installation of the wood frame foundation
Once we had done our best to prepare the site, it was time to lay the wood post foundation on top of the base. It took 4 men to carry the frame over to the site and get it into place. We checked each side of the frame with a level to ensure that it didn’t slope from front to back or left to right.
Once the frame was in place, we lined the inside of it with landscape fabric. We stapled it to the inside of the frame to secure it. We then filled the frame with pea gravel. Several inches were enough to bring the level of the floor up to be flush with the frame around it.
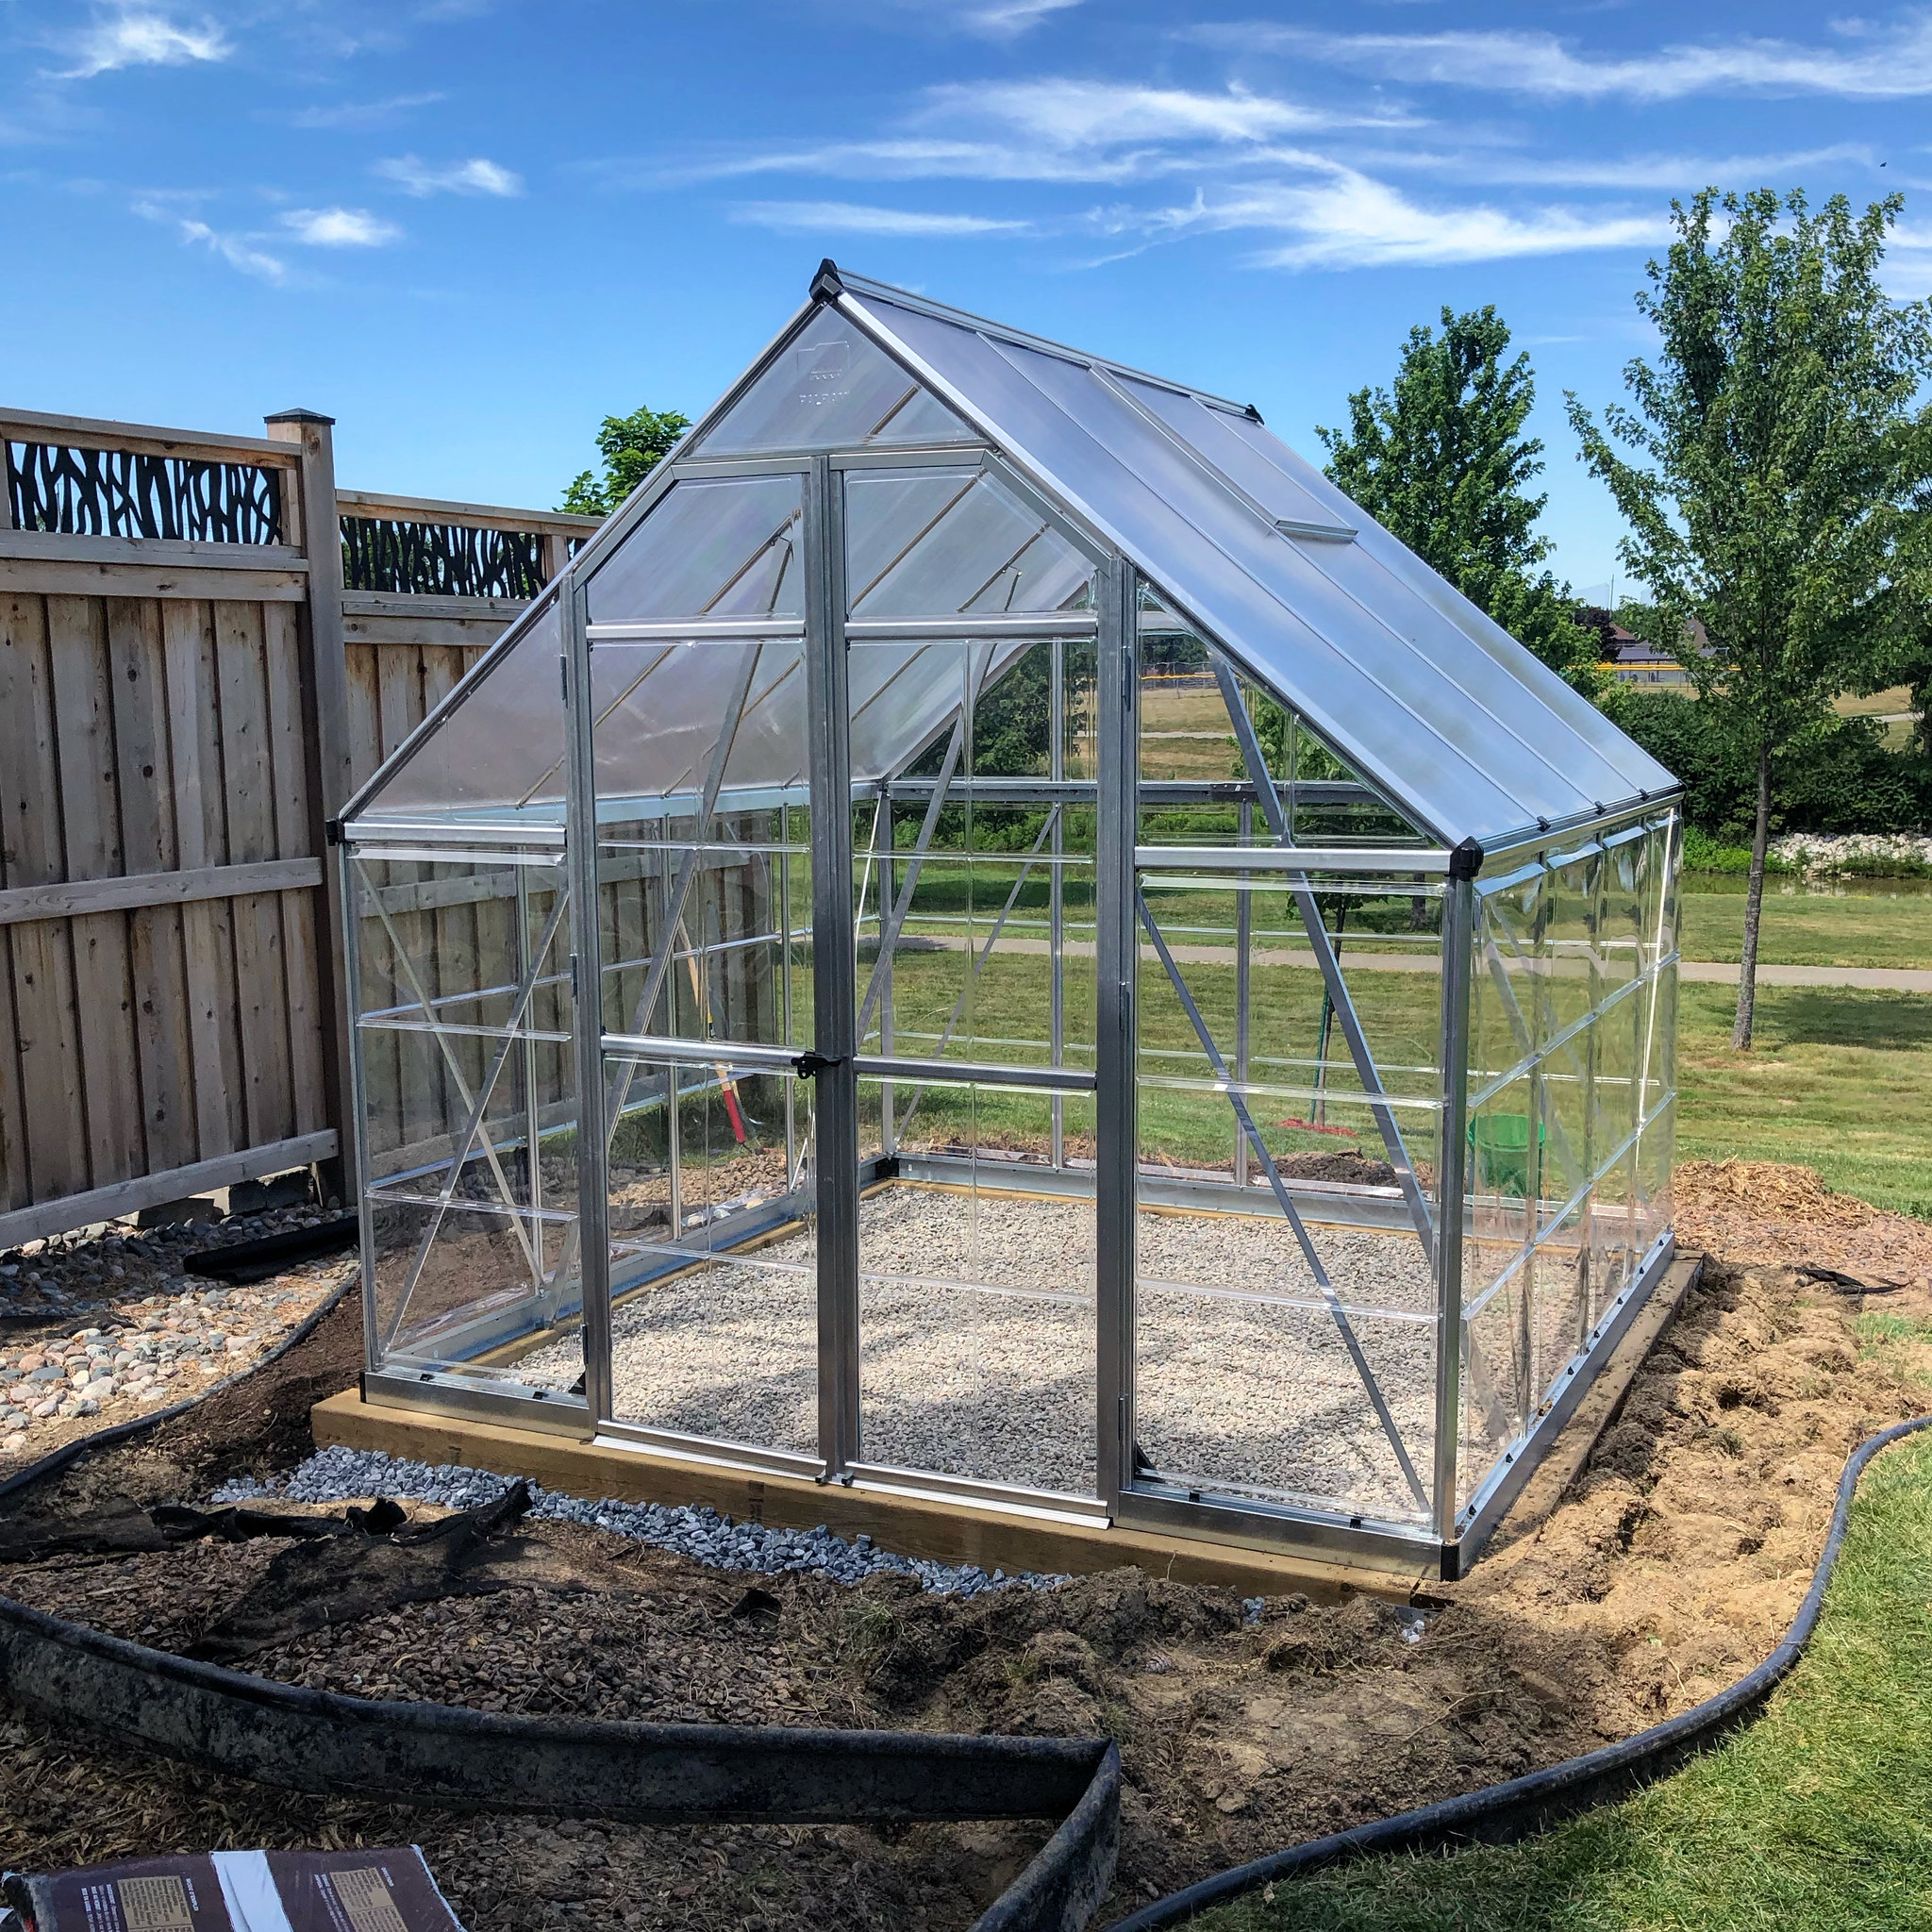
With the foundation complete, we were ready to assemble our Palram-Canopia Balance 8 ft polycarbonate backyard greenhouse kit! In our next post, we will share the tips and tricks we learned from our build.
[…] With the mental gymnastics of this thought process behind us, it was time to move on to constructing our greenhouse. We placed our order and it arrived quickly (two thumbs up for http://www.canada-greenhouse-kits.ca; they have been great to deal with). Stay tuned for our next post where we describe our experience in selecting and building a foundation for our polycarbonate backyard greenhouse kit. […]
[…] while the greenhouse frame is built at this point, it won’t be fastened down to your foundation until you’ve completed construction at the end of Day 2. That makes it especially susceptible […]