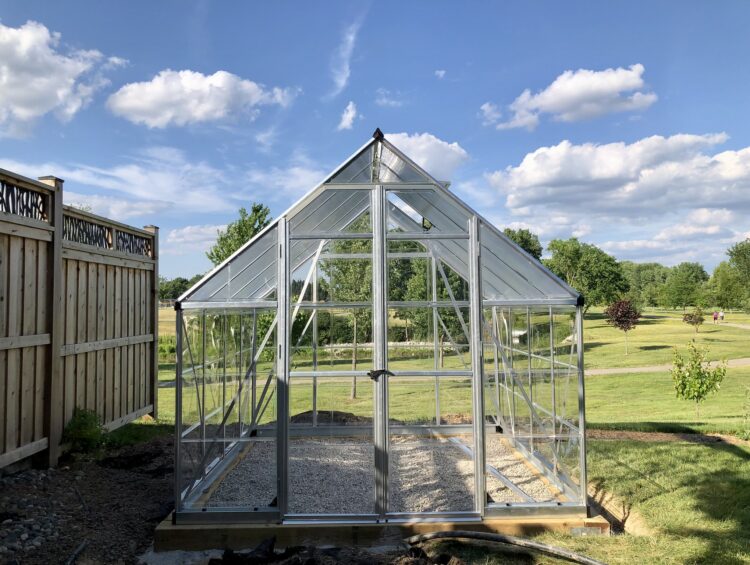
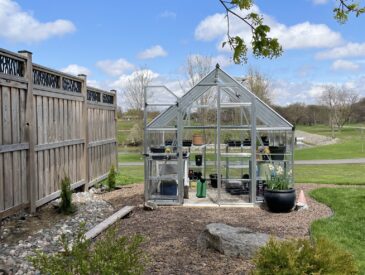
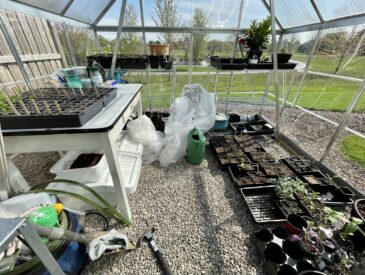
So you’re interested in building a backyard greenhouse! That’s great. There are a lot of benefits to a backyard greenhouse, from improving your property value to extending your growing season to giving you more precise control over your growing conditions. But how do you decide what kind of greenhouse to invest in? What factors should you consider? And if you choose a polycarbonate backyard greenhouse kit, what is the build process like? Here, we’ll walk you through the thought process we engaged in before ultimately selecting our greenhouse, a Palram-Canopia Balance 8×8 ft polycarbonate greenhouse kit. In the next post, we will share our experience with the actual construction process.
Background about our backyard greenhouse location
We live in the city on a typical suburban lot. We were able to build a greenhouse when we took down three large diseased trees from the back corner of our property that abuts a neighbour’s privacy fence. The area is roughly square. It is sheltered from the worst of our winds and faces south, giving it maximum sunlight. It sits on a small slope leading down to a public greenspace and path. And it’s adjacent to four large, raised garden beds we installed several years ago.
How we selected a polycarbonate backyard greenhouse
There were 3 types of greenhouses that we considered building with the budget, space and location we had available: a hoop house, a DIY greenhouse built from recycled windows, and a polycarbonate backyard greenhouse kit.
Hoop house
A hoop house (also called a high tunnel or a polytunnel) is a tunnel made from semi-circular steel or plastic hoops that support a polyethylene shell. Hoop houses are typically large structures, with a long and narrow footprint. And aesthetically, they tend more toward ‘function’ than ‘form’, so they are most often found in rural settings. For these reasons, we didn’t entertain the idea of a hoop house for very long.
DIY recycled window greenhouse
There are some truly lovely examples of DIY greenhouses that creative and innovative souls have built after amassing a collection of old windows and doors. Take a look at these:
The only limits to these types of structures are your imagination and the collection of windows that you can curate. They tend toward a rustic or cottagecore aesthetic, but a unifying coat of paint on the components can help to create a more cohesive look.
Ultimately, we decided that this wasn’t the route for us, for several reasons:
- After perusing Facebook Marketplace for a few weeks, we discovered that free windows are hard to come by in our area. And the windows that we did see popping up were not cheap. We wanted to get started on our project sooner rather than later, and didn’t want to deal with the unknown timeline associated with amassing a collection of the properly-sized windows.
- Nor did we have (as working professionals) the time that would be required to fit whatever pieces we could find together, Tetris-style, into a workable design. We wanted to get our project completed within the current growing season.
- A recycled window greenhouse, fitted with multiple windows and pieced together with lumber to ensure a tight fit, would have been quite heavy and would have required a more substantial foundation than the one required for our ultimate solution.
- The fragility of a glass design was a deterrent. We do occasionally get hail in our area. Our greenhouse is also exposed to the public due to its location next to a greenspace. We didn’t want to risk a wayward baseball – or, worse, an act of vandalism – shattering a panel.
Polycarbonate backyard greenhouse kits
The drawbacks associated with hoop houses and DIY recycled window greenhouses led us to look at polycarbonate greenhouse kits pretty quickly. These kits are aesthetically pleasing, convenient, durable, and cost-effective.
With the type of backyard greenhouse decided, we needed to narrow down our style options. There are only a few manufacturers selling polycarbonate greenhouse kits in Canada, with Palram-Canopia being the market leader. Their products are sold in specialty boutiques, big box hardware stores, and online. We eventually made our purchase through www.canada-greenhouse-kits.ca.
The selection of greenhouse kits available to consumers in Canada is more limited than what is offered in the USA. Regardless, we still had several styles and sizes to choose from. Our decision ultimately came down to the geometry of the greenhouse footprint, and the size of the greenhouse.
Backyard greenhouse geometry
There are multiple shapes of polycarbonate backyard greenhouse kits to choose from:
- Rectangular greenhouses were eliminated from our list immediately, because the layout didn’t suit our square site configuration.
- The Victorian, T-shaped, or Orangery design piqued our interest. They are more or less square-ish in shape, with an interesting design that includes a vestibule. But ultimately, this greenhouse has too large a footprint for our purposes. We wanted to build without needing a permit. In our municipality, a building permit is required for buildings larger than 108 square feet. This design is 120 square feet. And because of its large footprint, it wouldn’t have fit into the space we had available.
- We also considered Palram-Canopia’s octagonal design, called the Oasis. This design is 8 feet in diameter, which matches the dimensions of the design we ultimately chose. However, there are a number of factors that made us decide against it:
- Because of its angled sides, this backyard greenhouse has a much smaller total footprint. It has 42 square feet of interior space versus the Balance’s 64 square feet.
- The octagonal design, while very pretty, is not ideal for maximizing shelving and work surfaces inside the structure.
- The Oasis is ventilated with a side louver window rather than a rooftop vent. Airflow is critical in a backyard greenhouse. And because hot air rises, we thought the most efficient ventilation would come from a rooftop vent rather than a side window.
- Price – the list price for the Oasis is $2999 CAD compared to the 8×8 foot Balance’s $1898 CAD.
Square polycarbonate greenhouse designs from Palram-Canopia
Our site lent itself best to a square (or square-ish) shaped greenhouse. Palram-Canopia makes several square greenhouse models. Here are the criteria we used to narrow our selection down to the winner.
- We decided that an 8×8 ft footprint was the best use of space for our site. The 6×4 ft and 6×6 ft models were too small for our needs. A 10×10 ft model would have been too large to fit into our space, and anything beyond that would have required a building permit, which we wanted to avoid.
- We wanted a double-door design for both aesthetics and function.
- We prefer the look of single-wall polycarbonate panels for the greenhouse walls. These give a crystal clear look to the greenhouse. Double-wall panels provide more insulating value, but they also appear cloudy and mask the view into the greenhouse.
- We wanted an angular roof rather than a gothic arch or barn-shaped peak.
Given this list of criteria, the Palram-Canopia Balance 8×8 ft polycarbonate greenhouse kit was the clear winner.
Palram-Canopia Balance 8×8 ft polycarbonate greenhouse kit specifications
The specifications of many of Palram-Canopia’s polycarbonate greenhouse kits are the same. There are a few that can withstand higher winds and bear more snow accumulation. However, those were not requirements for us.
Here are the specifications for the greenhouse we chose:
- Wind resistance is 90 km/56 miles per hour
- Snow load is 75 kg/m2 or 15.4 lbs/ft2
- Panel construction is 0.7 mm single-wall polycarbonate for the side panels and 4 mm double-wall polycarbonate for the roof panels
- Light transmission is 82% for the roof panels and 90% for the wall panels
- The warranty is 5 years
With the mental gymnastics of this thought process behind us, it was time to move on to constructing our greenhouse. We placed our order and it arrived quickly (two thumbs up for www.canada-greenhouse-kits.ca; they have been great to deal with). Stay tuned for our next post where we describe our experience in selecting and building a foundation for our polycarbonate backyard greenhouse kit.


[…] In our last post, we described the thought process that led us to select a polycarbonate backyard greenhouse kit for our property. We knew we wanted to add a greenhouse to our property, and we considered the pros and cons of hoop houses, DIY recycled window greenhouses, and polycarbonate kits before finally deciding on the latter. In this post, we’ll describe the foundation we chose for our greenhouse, the alternatives we selected it from, and how we built it. […]
[…] we find it extremely handy, as new greenhouse owners, to be able to watch temperature fluctuations throughout the day. We compare temperatures inside […]